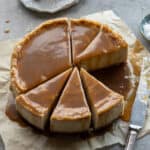
Description
Creamy and decadent vegan salted caramel cheesecake that will impress even the biggest cheesecake connoisseur. It’s easy to make and even easier to eat!
Ingredients
Base:
- 165g / 5.82 ounces digestive biscuits*
- 3 tablespoons vegan butter
Filling:
- ¾ cup / 105g raw cashews
- 460g / 1.01 pounds vegan cream cheese* (I used Tofutti)
- 1½ cups / 350g coconut cream*
- 3 tablespoons lemon juice
- ½ cup / 160ml maple syrup
- 2 tablespoons corn starch
- 2 teaspoons vanilla extract
- ¼ teaspoon salt
Salted caramel:
- 2/3 cup / 155ml coconut cream*
- ¾ cup / 145g brown sugar (firmly packed)
- ¼ cup / 50g vegan butter
- ½ teaspoon salt
- 1 teaspoon vanilla extract
Extra:
- Salt flakes
Instructions
- Place cashews for the filling in a bowl and fill with boiling water. Set aside for 20 minutes.
- Preheat your oven to 180 degrees Celcius (355 degrees Fahrenheit) and line the base of an 8-inch springform cake pan with parchment paper.
- For the base: Place all base ingredients into a food processor and pulse until a fine crumb is achieved.
- Transfer the base mix to the cake pan and press down evenly and firmly to line the bottom. Set aside in the refrigerator while you work on the filling.
- Drain the cashews and give them a rinse.
- For the filling: Add all ingredients for the filling in a high-speed blender and blend until nice and smooth. You may need to take it slow (on a low setting) as the mix will be pretty thick. As it thickens, you can slightly increase the speed. Make sure to stop and scrape down the sides of the blender a couple of times during this step.
- Pour the filling into the cake pan and spread the mixture evenly. Tap the pan on the benchtop a few times to eliminate bubbles trapped in the creamy filling.
- Place in the oven to bake for 1 hour 15 minutes to 1 hour and 30 minutes. The cake is done when there is a slight wobble in the middle of the cake and slightly browned on the top.
- Turn the oven off and leave the oven door ajar. I wedge the handle of a wooden cooking spoon in mine. Leave the cake to cool inside the oven completely.
- Transfer it to the fridge to set further for at least 3 hours.
- Once the cake is set, carefully run a knife around the inside edge of the springform pan to separate the cake from it. Release the pan and transfer to a plate, also removing the parchment paper.
- For the salted caramel: To a small pot on medium-high heat, add in the coconut cream, vegan butter and sugar and bring it to a boil, stirring. Then reduce the heat to a simmer and stir until it thickens for 5-6 minutes. It will continue to thicken as it cools. Place in the refrigerator to thicken even more.
- Once you’re ready to serve, drizzle the chilled caramel over the cake and sprinkle with additional salt flakes on top.
Notes
Biscuits: For a gluten-free cake, use gluten-free biscuits. I used digestive biscuits, but Graham crackers or Biscoff biscuits will also work well.
Vegan cream cheese: I’ve used the Tofutti ‘Better Than Cream Cheese’; however, I’ve heard many others have success with Kite Hill and Miyoko’s cream cheese substitutes as well.
Coconut cream: Use only the thick and creamy part of the coconut cream in the can. If you don’t have access to coconut cream, refrigerate a can of full-fat coconut milk overnight and then scoop out the cream that has separated on the top.
Please make sure you make this cake at least one day before you plan to serve it. Both components (the cake and the salted caramel) must be chilled before serving.
Storage: This cake will keep in the refrigerator for up to 5 days in an airtight container. Depending on the cream cheese that you use, you may be able to freeze it. I used Tofutti and would not recommend freezing it. The texture isn’t the same once thawed out. Check the packaging of the cream cheese that you use if it’s okay to freeze.
- Diet: Vegan