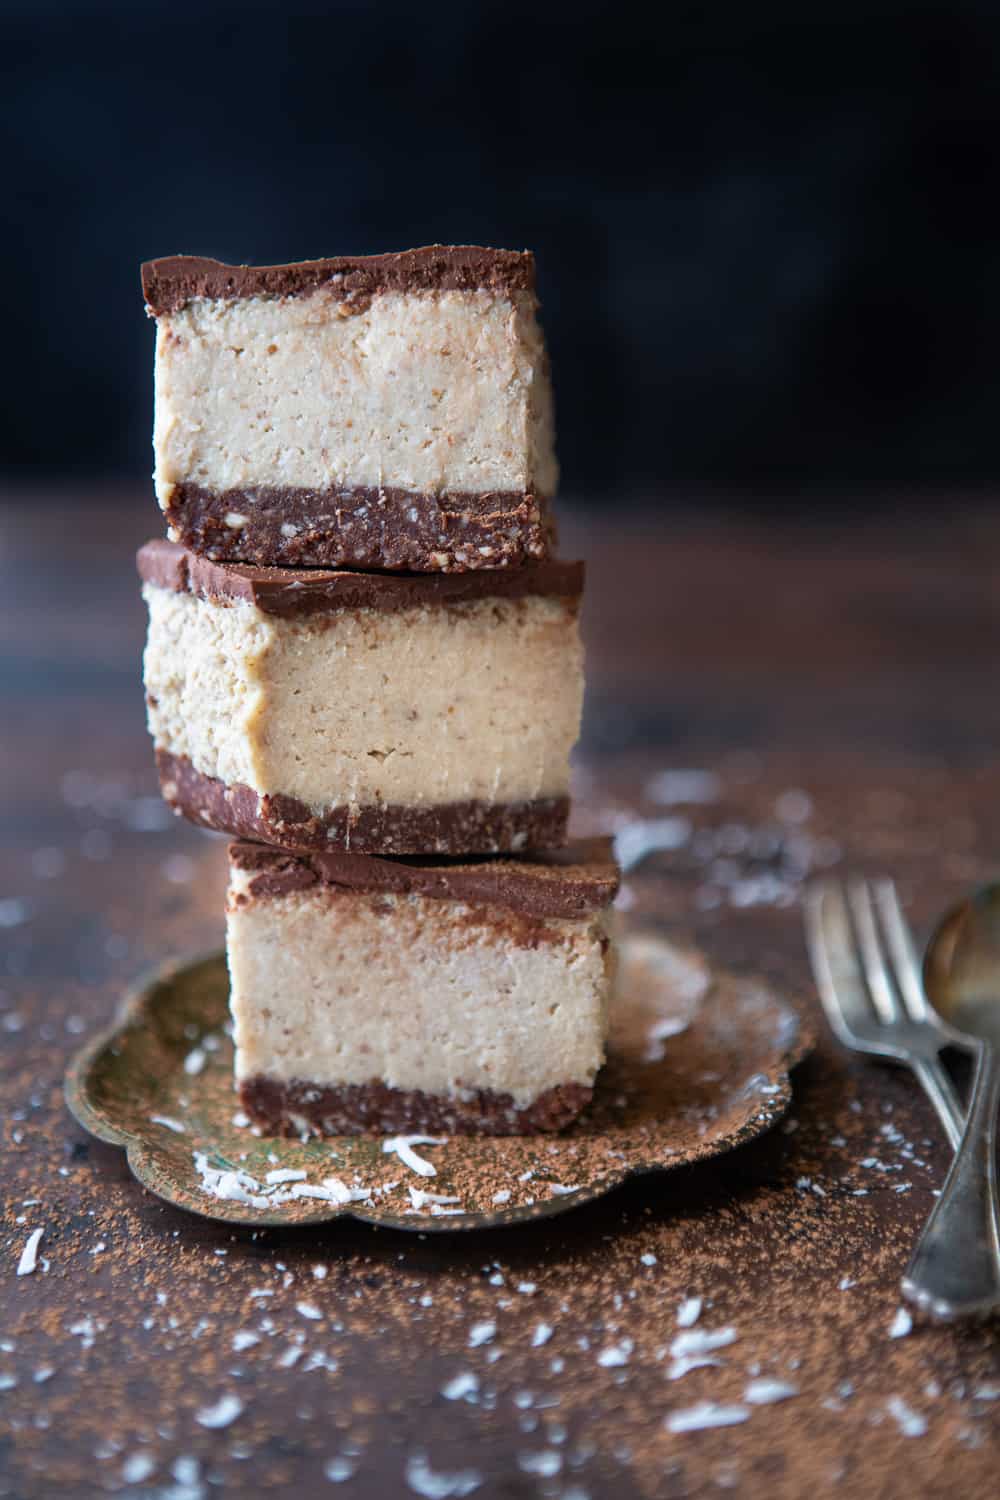
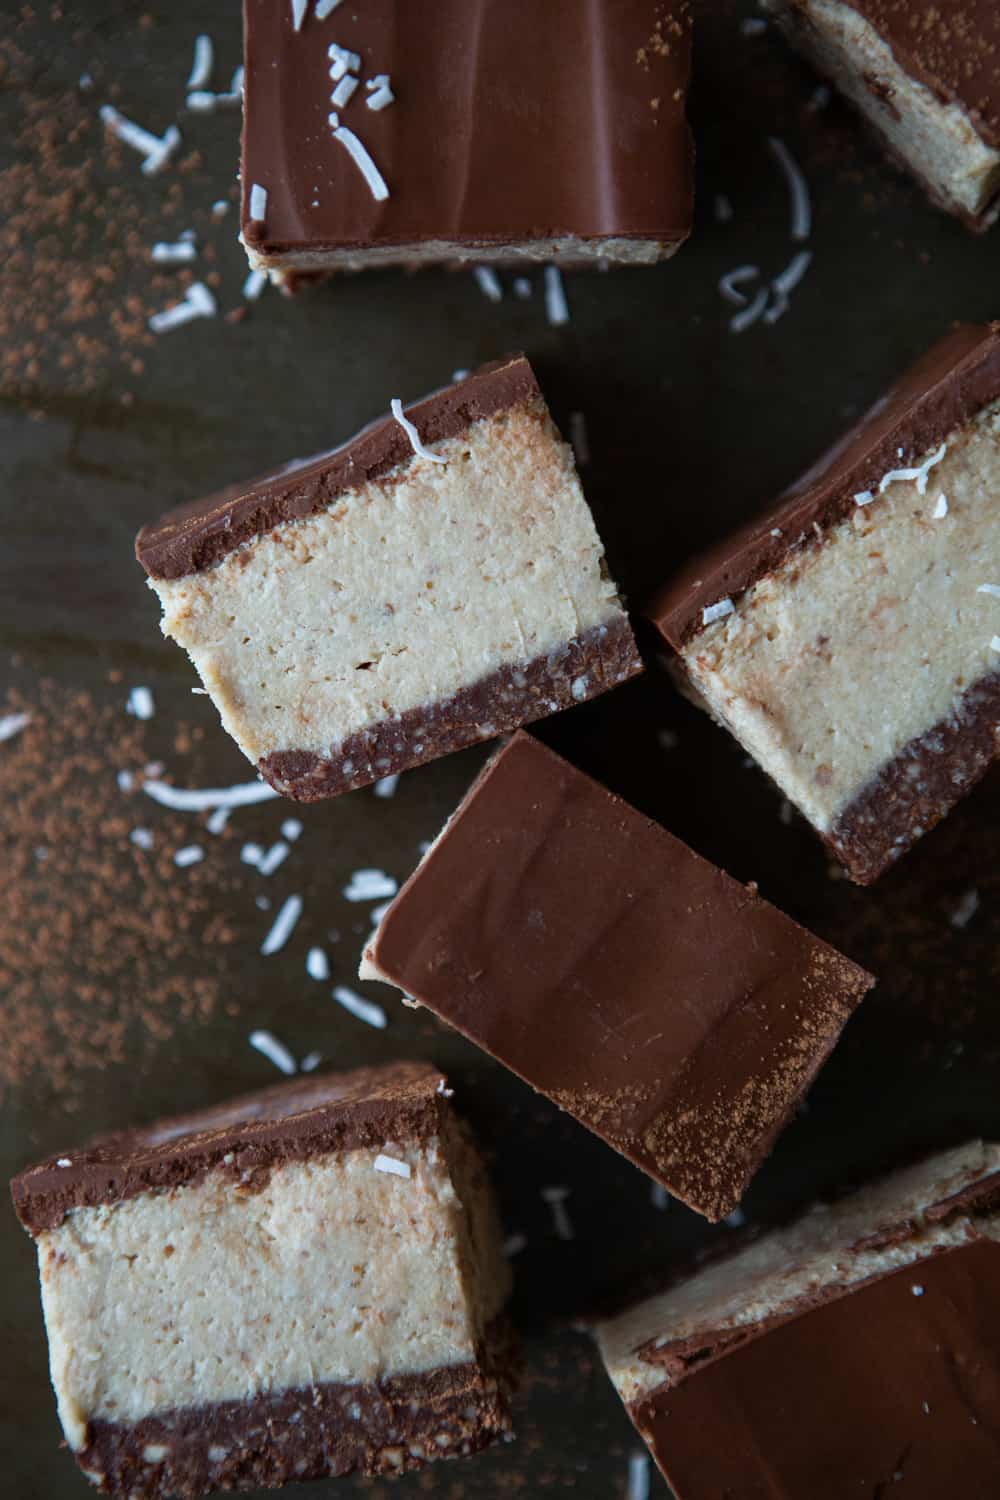
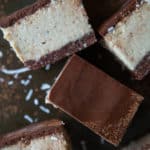
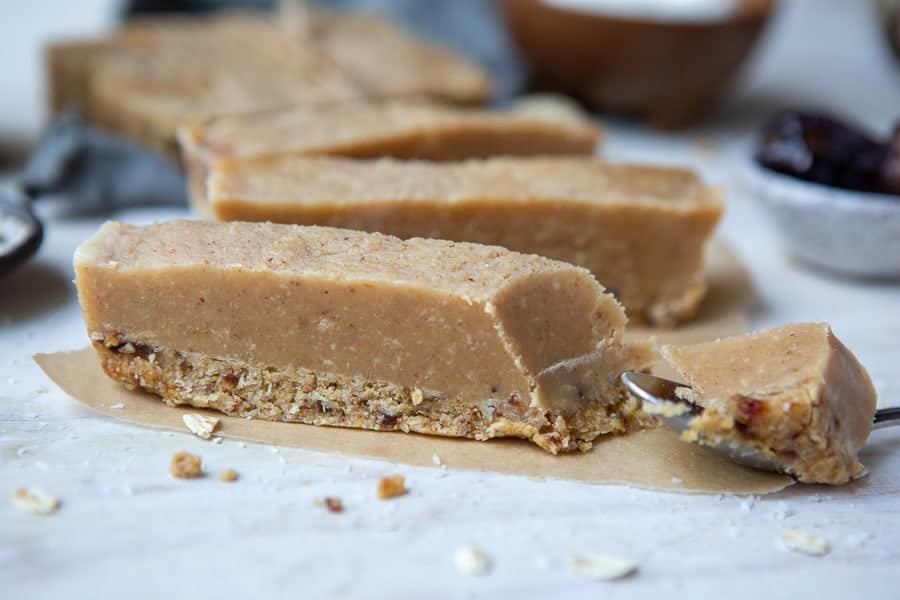
No-Bake Choc Coconut Slice (Vegan)
This easy no-bake choc coconut slice is the perfect treat to have that doesn’t make you feel guilty for eating it. It’s refined sugar-free, gluten-free, almost raw, made using whole foods, and great to keep in the freezer for when you feel peckish.
If you’re like me and don’t find the excitement in raw treats anymore, this slice will win you over, especially if you have a sweet tooth and love coconut and chocolate.
What’s not to love? Coconut and chocolate are a marriage made in heaven!

This post may contain affiliate links, for which we earn a small commission at no additional cost to you. Read our full disclosure here.
Free Recipe eBook
Join our newsletter and get our eBook featuring exclusive breakfast recipes to kickstart your mornings.
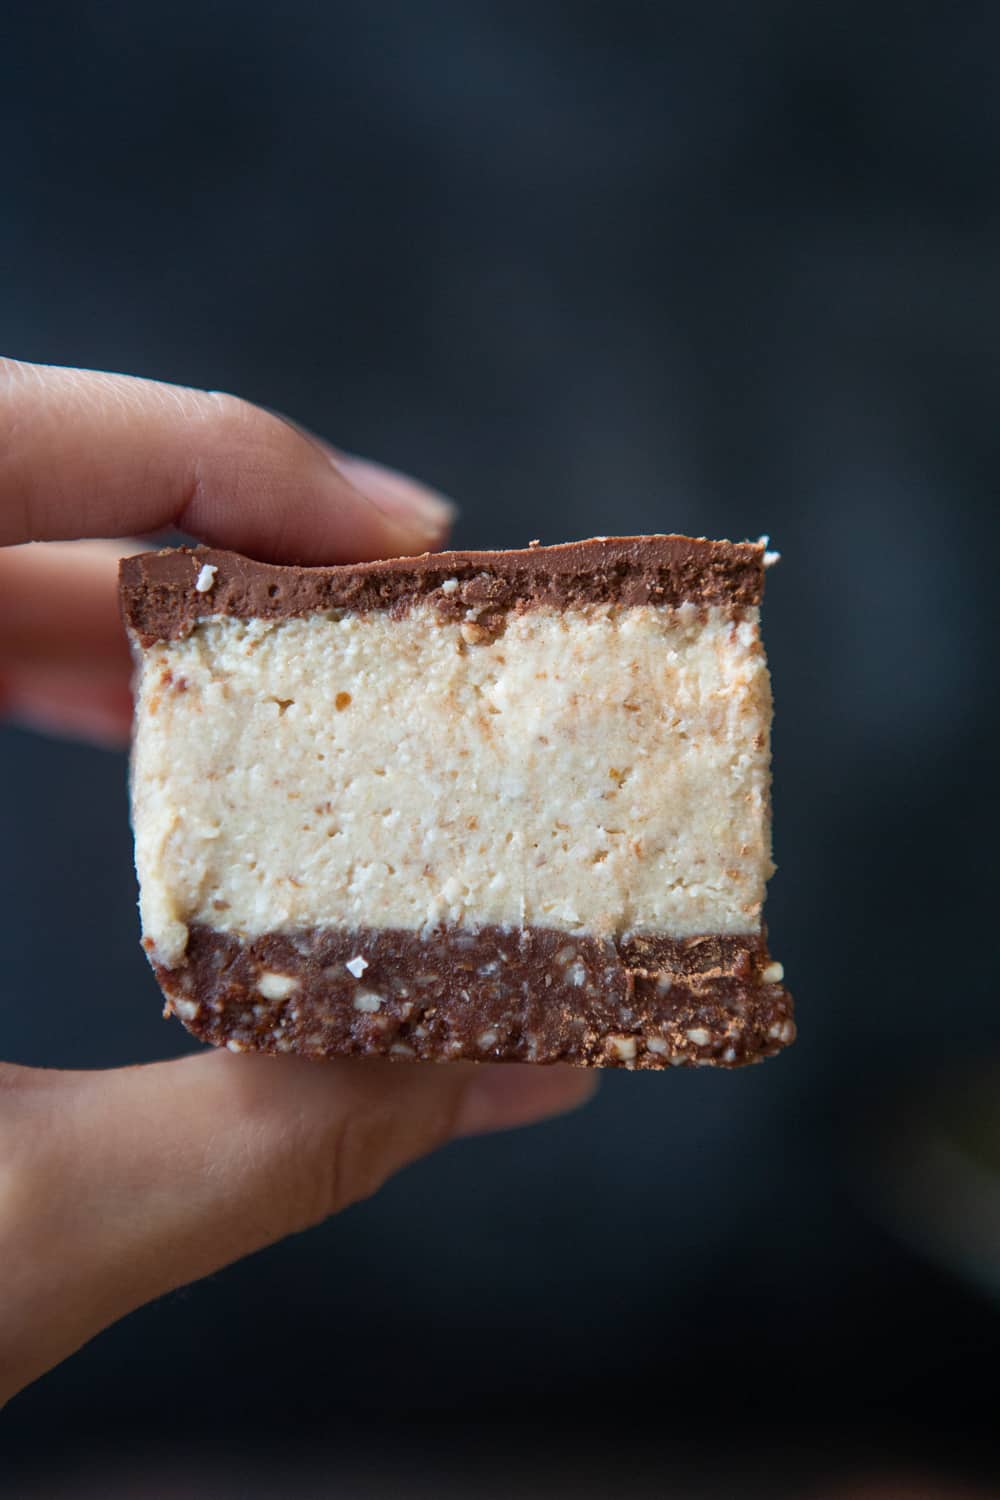
It’s creamy, rich, smooth, with a bite from the chocolate that balances out the sweetness of the coconut layer.
This recipe is filled with nutrient-dense ingredients. Here are the benefits of some of the key elements:
Coconut
I’ve used coconut cream, coconut oil and desiccated coconut in this recipe.
Some of the benefits of coconut are:
- Coconut is excellent for skin, and hair
- It’s also a fantastic source of good fats
- High in antioxidants
- Can assist in better brain function
- Is great for oil-pulling, and oral health
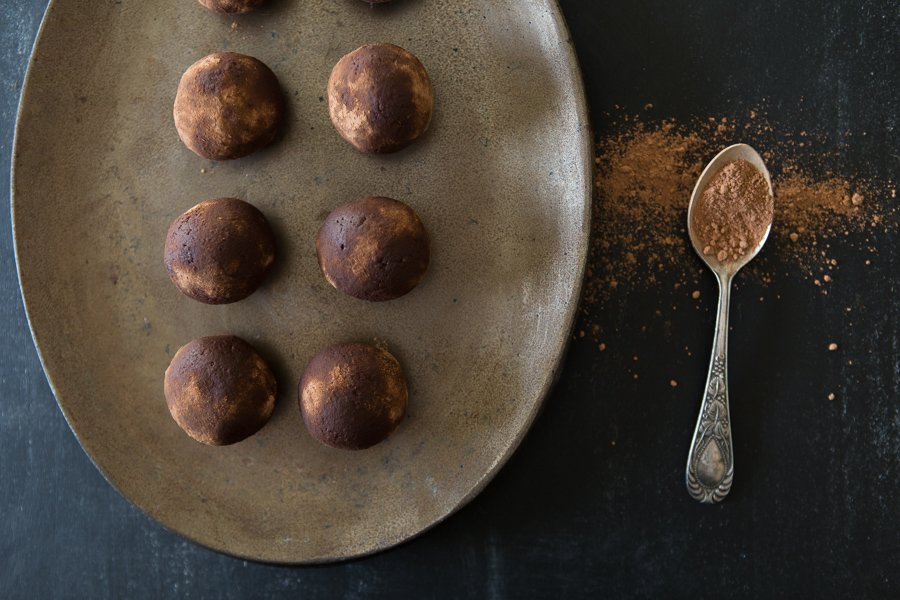
Cacao
I’ve used raw cacao powder in both the base and the topping in this recipe. There is certainly a difference between cocoa and cacao powder. Cocoa is the cheaper, heat-treated and lower quality product from the cacao bean. I always go for a raw cacao powder (usually organic) to get the best out of the bean.
If you want to learn more about the difference between cacao and cocoa, you can find that information here. Some of the health benefits of raw cacao powder are:
- Cacao beans are rich in nutrients like iron, zinc, magnesium, potassium, calcium, copper, and manganese
- Rich in antioxidants
- Is known to be a natural mood booster and anti-depressant
- May lower your risk of cardiovascular issues
- Can assist in blood flow to the brain and improve brain function
Cashews
Cashews are a great ingredient in many vegan and raw recipes. They’re lovely in both sweet and savoury meals. They make a great creamy white sauce for bakes and anything else that asks for a white or bechamel sauce.
It’s a great neutral nut to add to desserts such as cheesecakes, slices and bliss balls. I have a good range of raw desserts you can browse if you’d like to explore those!
Some of the health benefits of cashews are:
- Promotes heart health
- Assists with digestion
- High in many different vitamins and minerals like copper, zinc, phosphorus, magnesium, selenium, iron, Vitamins B-6, K and E
- Promotes hair growth and healthy skin
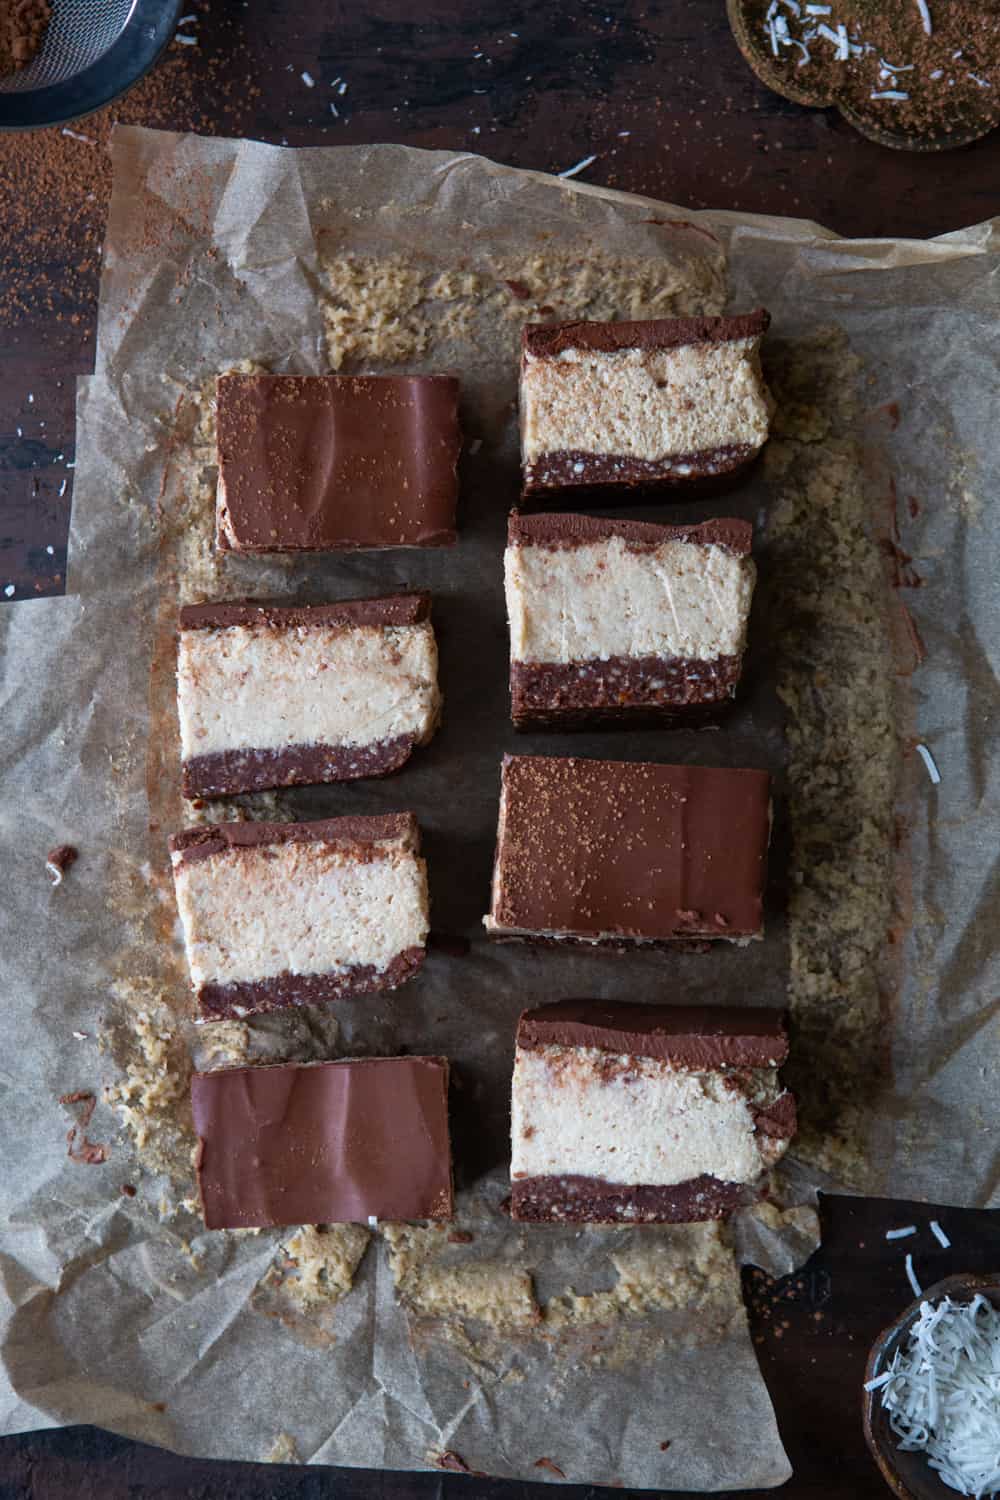
Easy freezer-friendly slice
This no-bake choc coconut slice is:
- Perfect for a large group of people
- Rich
- Creamy
- Decadent
- Crunchy chocolate with a smooth filling
Other recipes you’ll love:
- Chocolate Chia Seed Pudding with Cashew Cream
- Fluffy Vegan Chocolate Mousse
- Vegan Chocolate and Pear Loaf Cake
- No-Bake Ginger Slice (GF and Vegan)
- 3-Ingredient Chocolate Puffed Rice Slice
If you try this recipe, let me know! Would love for you to leave a comment and rating below. If you want to go that extra mile, tag us on Instagram or share your photo of the recipe on Pinterest. Or Pin It for later!
No-Bake Choc Coconut Slice (Vegan)
- Prep Time: 30 minutes
- Cook Time: 3 hours 30 minutes
- Total Time: 4 hours
- Yield: Makes 12-16 slices
Description
This rich and creamy no-bake choc coconut slice is the perfect afternoon treat when you’re craving something sweet.
Ingredients
Base:
- 1 cup / 150g almonds
- 2 tablespoons coconut oil, melted
- 2 tablespoons cacao powder
- 2 tablespoons maple syrup
- Pinch of salt
Filling:
- 1½ cups / 210g raw cashews*
- ¾ cup / 60g desiccated coconut
- 2 tablespoons maple syrup
- 10 Medjool dates, pitted
- 1 cup / 240g coconut cream*
- Pinch of salt
Topping:
- ⅓ cup coconut oil
- 2 tablespoons maple syrup
- ¼ cup / 25g cacao powder
- ¼ cup / 60g coconut cream*
Instructions
- Place the cashews for the filling in a bowl and top with boiling water enough to cover them. Set aside.
- Blend all base ingredients in a food processor until you can pinch it and it stays together. You may need to scrape the sides to make sure that it’s all blended equally.
- Line a loaf baking dish with unbleached baking paper and press down the base dough firmly. Put in the freezer.
- Drain the cashews and add to the food processor along with the rest of the filling ingredients, and process until smooth. You may need to scrape the sides to make sure that it’s all blended equally.
- Pour over the top of the base and put back in the freezer. This will take around 3 hrs to set. When checking it, touch the top, and it has to be pretty firm. You can also do this step overnight.
- Just before you take the slice out of the freezer, combine all the topping ingredients in a small saucepan before putting on the stove. Once you have all the ingredients in the pot, add to the stove on low heat, constantly stirring until a smooth consistency is reached. Be careful that it doesn’t split. It’s crucial for you to keep stirring. Once all the ingredients have been incorporated well, remove from heat and stir really vigorously until you reach a nice creamy, smooth, glossy chocolate.
- Remove the slice from the freezer and pour over the topping to set, and wait until it goes semi-hard before putting back in the freezer for the topping to harden (around 15-20 mins).
- Cut with a sharp knife, cleaning in between each cut to get a smooth and clean slice.
- Serve cold. We like it pretty much out of the freezer as it stays really well together and is chewier. Always store in the fridge or freezer as it will start to soften otherwise.
Notes
Cashews: If you want to keep this slice raw and you have time, you can soak the cashews in cold water for three hours instead of the boiling water suggested in the instructions.
Coconut cream: Make sure that this is the thick creamy part of the coconut cream can. Not the liquid.
- Diet: Vegan
Question re: “Make sure that this is the thick creamy part of the coconut cream can. Not the liquid.”
Are you saying, buy a can of coconut cream and do not shake it prior to opening? Then, after opening, only use the thick, coagulated part and throw away the watery part?
Hi Carlee, yes that is what you should use. However, don’t throw away the water. Use it for something else 🙂
In #7, you write: “Remove the slice from the oven?” What? Did you mean from the freezer? What did you mean?
Whoops yes, that’s a typo! Apologies, we’ve fixed it up. Thanks for letting us know.
It is hard to find the easily printed version of your recipes without going through many photos and ads.
Hi Leigh, thanks for your feedback. We’ve just added a “jump to recipe” button at the top of the page to make it easier to get to the ingredients, instructions, and printing. We hope this helps with your experience on our site in the future!