How To Make Hummus From Scratch Using Dried Chickpeas
Have you ever wondered how to make hummus from scratch using dried chickpeas? Silky smooth, balanced, light and fluffy. Is this how you would describe the hummus you’ve been eating?
If not, I have some news for you. You haven’t made or bought the best hummus yet. I’m here to show you how to make hummus from scratch and transform your life.
If you’re currently buying your weekly dose of hummus at your local grocer, that will not compare or come close to how tasty the real hummus is when you make it at home using dried chickpeas.
Yes, it’s a little more involved than grabbing a tub off the fridge shelf and tossing it into your trolley but trust me, you’ll never buy another tub of hummus again after you make this recipe.
Free Recipe eBook
Join our newsletter and get our eBook featuring exclusive breakfast recipes to kickstart your mornings.
Now before we get into talking about all things hummus related, let’s clarify something. Hummus literally means “chickpeas” in Arabic. So for those of you that say chickpea hummus, you’re saying “chickpea chickpea”. Now that we have that out of the way, let’s get into it, shall we?
This popular Middle Eastern dip is known to be made fresh every morning and served as breakfast, a snack, as well as on the side of most meals for lunch and dinner.
Hummus has won the world over, but it’s so much more than just a snack to be served with carrots and celery sticks. I’m not saying that there’s anything wrong with that. It’s super healthy and all, but hummus has so much more potential. I’ll get to serving suggestions later.
Even though I already have multiple recipes that use hummus, I was inspired by a cooking series I watched on Middle Eastern cuisine to do a better job at it.
I got excited about challenging myself to make the best classic hummus that you can find. Simple, everyday ingredients that most of us already have in our pantries that transform into a beautifully smooth and creamy spread.
Up until this point, I’ve been making hummus at home for around 8-9 years, and it’s been good. But I’ll never make that hummus again. Once you try this, you won’t go back either.
Not only will the flavourless store-bought hummus never set foot in your house again, but you’ll be wondering where the real hummus has been all your life. The way that you’ve been eating it will also transform. Let me explain.
I always used to eat only cold hummus. Make it ahead of time and store it in the fridge to enjoy over multiple days. I also always used canned chickpeas. Those two rookie errors alone will change the game. If you normally don’t like hummus, this recipe will change your mind!
What is in hummus?
You’ll find only a handful of ingredients in any good hummus recipe. Here’s what you’ll find in this one.
Chickpeas
Chickpeas are what makes hummus, hummus. They’re a great protein-filled legume that is a wonderful base for our favourite dip. You can use dry or canned chickpeas for this recipe; you can read more about that in my tips and tricks section below.
Read more: 20+ Epic Vegan Chickpea Recipes For Every Occasion
Tahini
Tahini is a sesame seed paste that creates a beautiful nutty and earthy flavour in the hummus. Complimenting the chickpeas perfectly, the quality of the tahini is essential.
Only use the variety that you like the taste of on its own, and make sure you stir in the natural oils that can sometimes sit on top. To learn more about tahini, I’ve written about it in my tahini dressing recipe.
Lemon juice
Use only freshly squeezed lemon juice. The kind that you buy at the shops that come in a plastic container will not give the hummus the same zesty freshness. This brightens the tahini and gives it that lovely lightness and fresh flavour to round out the tahini notes.
Raw garlic
The same goes for garlic. Please use fresh, raw garlic for this recipe. It makes all the difference. Use more or less depending on how much you love the bite that raw garlic gives.
If you want to mellow the lemon out a little, add it to the lemon juice in a small bowl for 10 minutes before adding it to the food processor. It’ll just take the edge off a little.
Salt
The key ingredient to bring all the flavours and ingredients to life! Adjust the salt to your palette.
Cumin
Ground cumin is not always used in hummus (normally used as a topping), but I like the earthy balance and hint of flavour that cumin brings to the dip. This ingredient is totally optional.
Olive oil
This hummus is technically oil-free, but in a classic hummus, you’ll always see a generous drizzle of oil in the crevices of the hummus on your plate. It stops the hummus from drying out and adds that extra bit of creaminess. It’s not necessary. However, you can also add 1-2 tablespoons of olive oil into your hummus to give it that extra elevated flavour.
I haven’t personally tried it, but I’ve heard that you can use olive oil in its place if you don’t want to use tahini. You would use much less so you don’t get that strong olive oil taste in the back of your throat, but add it in a single stream with the food processor on to achieve ultimate creaminess.
What makes hummus so creamy?
The creaminess comes from a few different factors: good-quality tahini, super soft chickpeas, and cold water if needed.
The way that you get the chickpeas silky smooth is by adding one little extra ingredient into your cooking water, bicarb soda.
Bicarb soda (aka baking soda) raises the pH level of the water and helps the chickpeas break down, creating that creamy pureè for the perfect hummus.
One last factor that also helps get the best creamy hummus is removing the chickpea skins once you’ve cooked them. It’s easier than you think once the chickpeas have overcooked in the bicarb salty water.
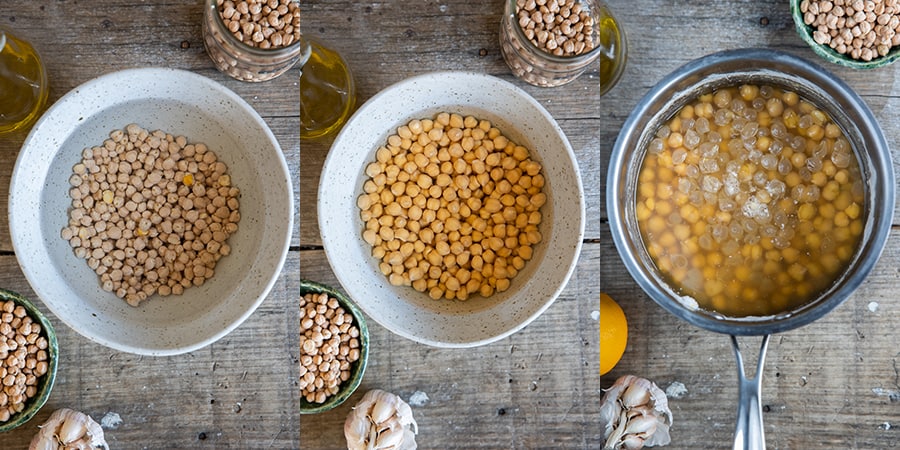
Most of the chickpeas will float to the top (see photo below, end right), and you can typically just scoop them out that way.
Rinse and repeat until you get as many of the skins as possible. I wouldn’t stand there peeling each one (unless you feel like it) as it can get time-consuming, and I think if you get the majority of them, it’ll be fine.
Here are my tips and tricks to make the best homemade hummus
- One thing that most people don’t realise is that hummus is meant to be eaten warm or at room temperature, not straight out of the fridge. The first time I made hummus with dried chickpeas straight after having cooked them, the flavour profile was so different and in a good way! Give it a try. If you want to warm it up if it has been in the fridge, just transfer it to a pot and cook for around 10 minutes (add some water and stir it in) on medium heat or in the microwave in 30 second intervals, stirring occassionally. The flavours really come alive!
- As I mentioned above, adding bicarb soda is key to get a silky smooth and creamy hummus. Please don’t skip this step!
- Another thing I made note of above is to remove chickpeas skins once they’ve cooked. If you don’t have the time, or can’t be bothered, your hummus will still taste amazing, it just won’t take it to the next level – that being silky smooth and ridicilously fluffy.
- It’s really important to use a good-quality tahini for your hummus. I used to use unhulled tahini for years because of its extra nutritional value, but it’s too bitter for a traditional hummus. So, I’ve started using hulled tahini for my hummus. This means that the outer kernel has been removed from the sesame seed therefore removing the strong bitter flavour and making it lighter in colour. I believe it also makes the consistency of the tahini nice and thin. The brands that I use are either Chef’s Choice or the Macro (Woolworths brand) here in Australia. I’ve heard that Soom makes a really nice tahini if you’re based in the US.
- Hummus is freezer friendly. Simply add it to an airtight container – leaving about an inch of space at the top as the hummus will expand as it freezes. It’ll be fine for around 2-3 months in your freezer. To defrost, pop it in your fridge overnight. You may get a thicker hummus, and can fix that with stirring in a bit of cold water.
- You can store it in the fridge for up to 5 days.
- Ideally use a food processor or blender to make your hummus (I’ve tried both with great success). However, if you don’t have either of those, I’ve seen it made traditionally with a pestle (from a mortar and pestle- the pounding stick) and a ceramic bowl. You can see that method in this video. Your hummus will be thicker and chunkier but delicious nevertheless!
- If you don’t have time, or can’t find dried chickpeas, you can use canned chickpeas instead. (Just note that you won’t get the same results.) Add the drained chickpeas to a pot with 5 cups of water and ½ a teaspoon of bicarb soda. Bring to the boil and then reduce to a gentle simmer and cook for around 15-20 minutes until the chickpeas are super soft. From there, follow the rest of the instructions as per the recipe below.
Topping ideas for creamy homemade hummus
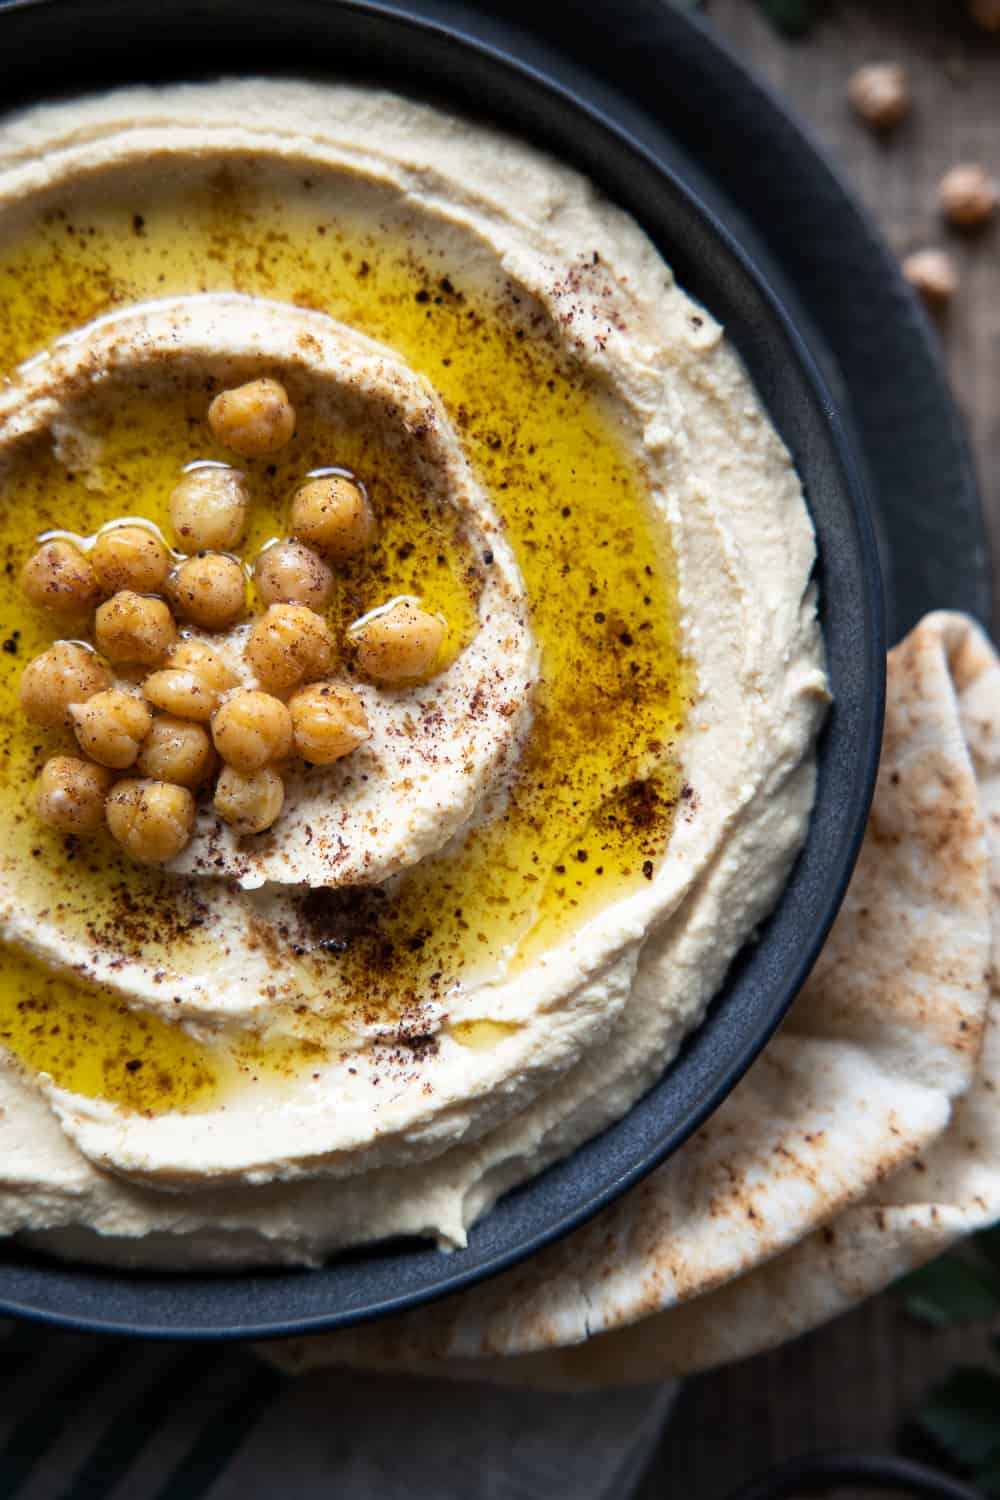
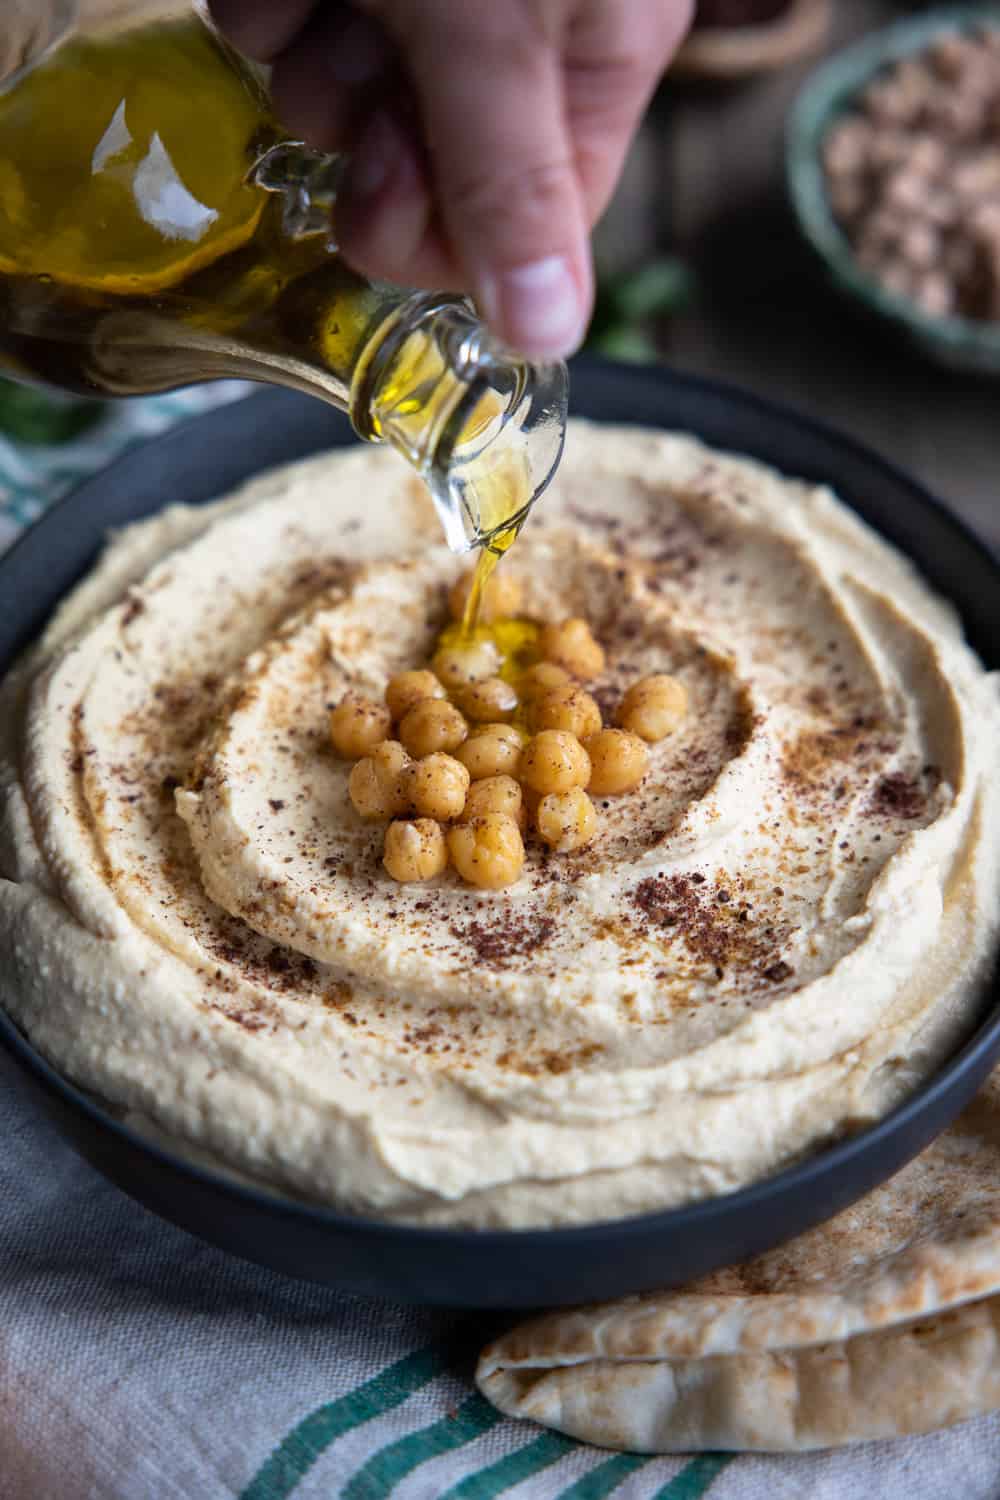
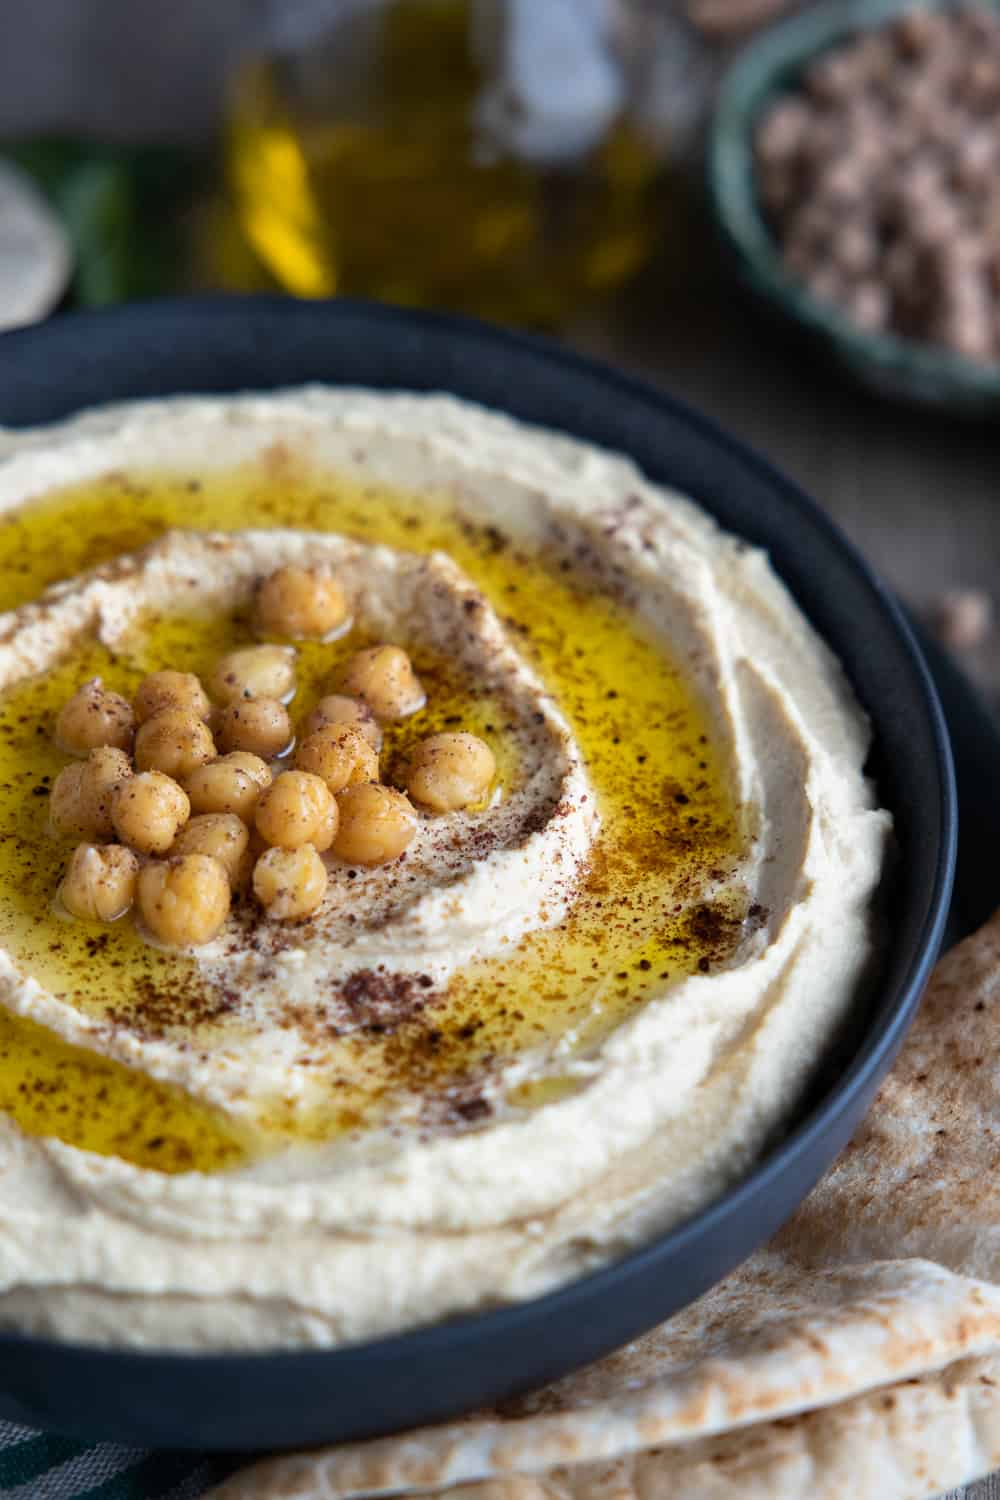
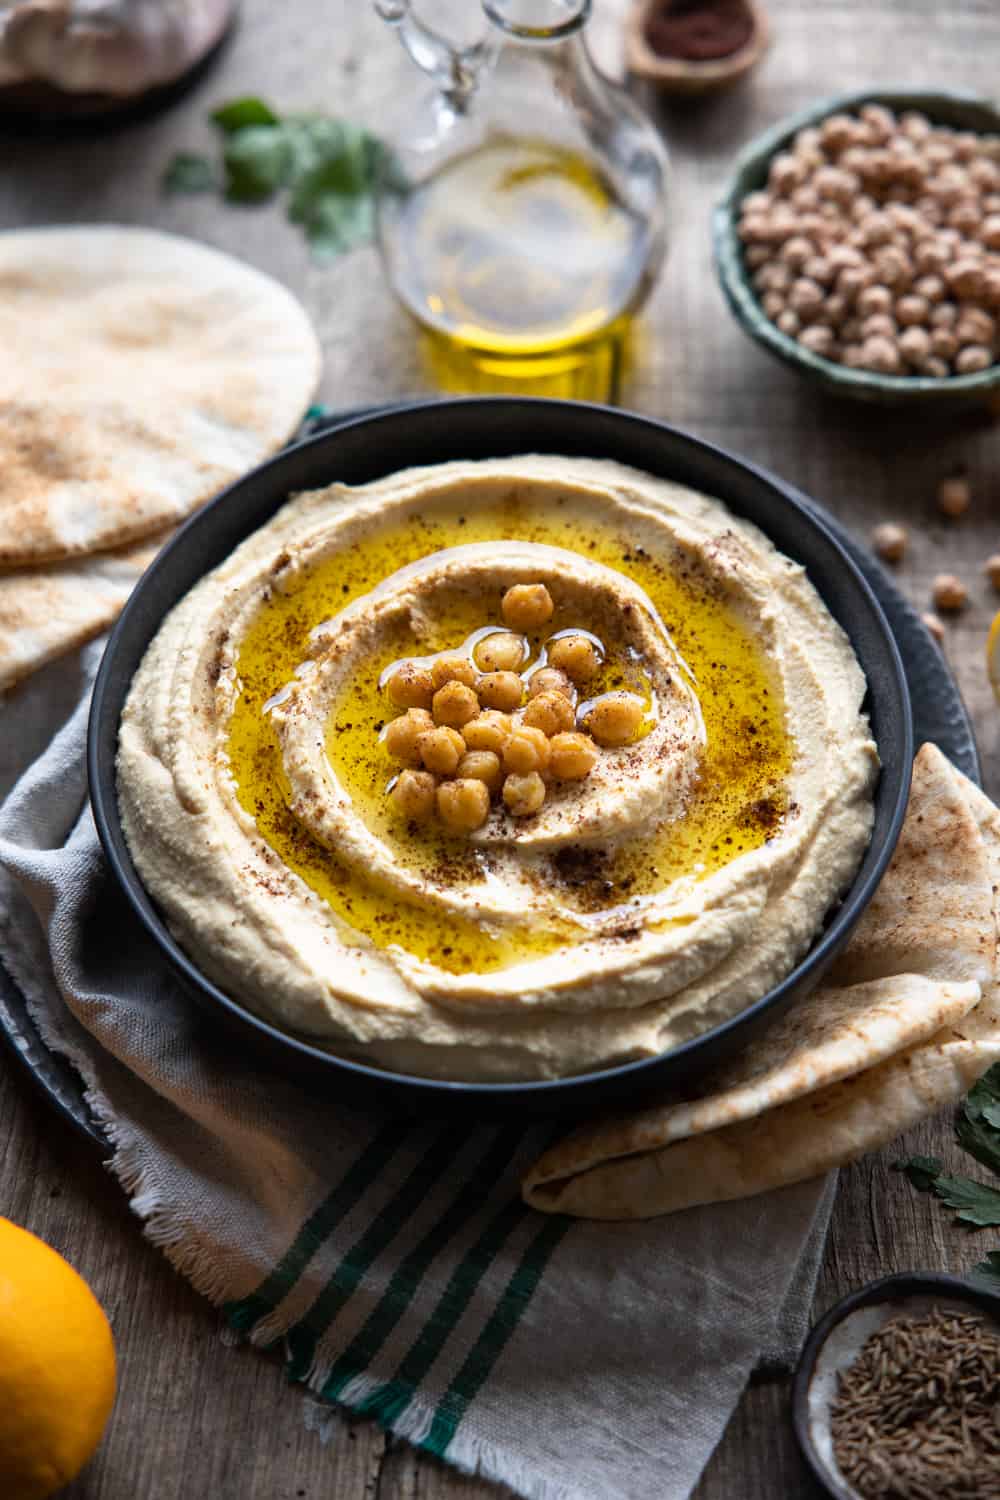
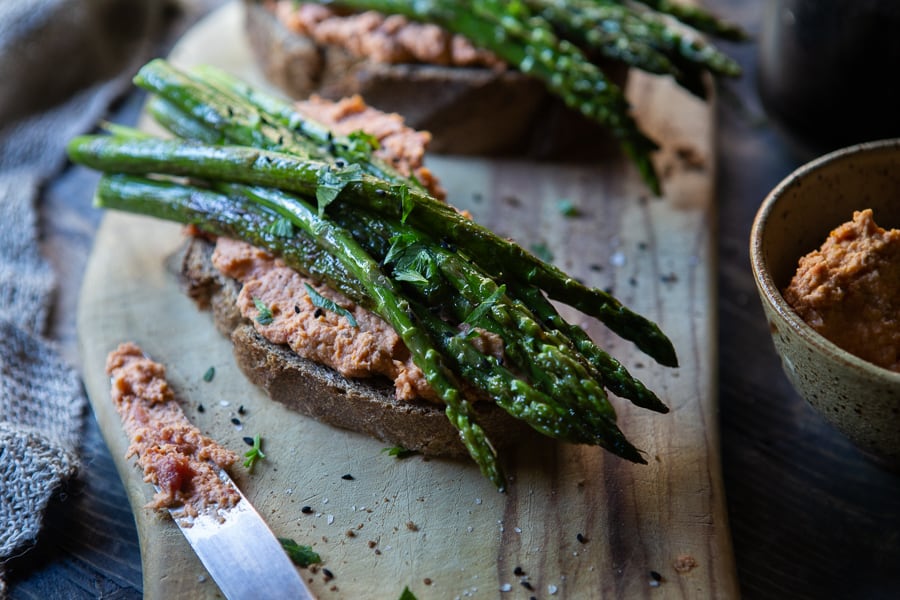
There are an endless amount of ways to serve your hummus. For this recipe, I wanted to keep it super simple and authentic. Mine is topped with some of the saved cooked chickpeas, cumin powder, sumac, and olive oil. Below are a few extra suggestions to get your creativity flowing.
- Thin strips of red roasted peppers
- Pickled whole green peppers/chillies/jalapenos
- White/black sesame seeds
- Za’atar spice
- Any fresh green herb, in particular, parsley and cilantro/coriander
- Lemon zest
- Marinated chickpeas (yes, chickpeas on chickpeas are delicious!)
- Chilli powder
- Olives
- Fresh or sun-dried tomatoes
- Baked garlic cloves
- Caramelised onion
- Pickled onion
- Freshly squeezed lemon juice (if you like extra zing)
- Toasted pine nuts
- Flaked or slivered almonds
What can I serve with hummus?
Just like the topping ideas, this list is also almost endless! Here are some ideas to help you get started.
- In a wrap with falafels
- Dip falafels into it
- Dip any kind of bread into it
- An addition to an entree
- With roasted vegetables
- On the side of a salad
- On toast with tofu scramble
- On toast with other toppings (see toppings above for ideas)
- As breakfast with a few different condiments (gherkins, olives, bread, roasted red bell peppers)
- As part of a toastie, burger, or sandwich
- The most popular way (until now) alongside crackers, carrot, and celery sticks
- Part of a nourish bowl
- Tossed through noodles or pasta
If I haven’t convinced you yet to try this recipe, I don’t know what will! With any simple recipe that you do try, adjust the ingredients to your liking.
Prefer the hummus to be a little bit more garlicky? Add an extra clove. Want a stronger tang? Add more lemon juice. You get where I’m going with this. More or less salt, even some pepper or chilli powder for that slight bit of background heat.

Other recipes you’ll love:
- How To Make Tahini Dressing
- How To Make Vegan Falafel
- Easy Garlic Parsley Sauce
- Spiced Roasted Pumpkin with Farro and Hummus
- Vegan Falafel Wrap
- Vegan Falafel Bowl
If you try this recipe, let me know! We’d love for you to leave a comment and rating below. If you want to go that extra mile, tag us on Instagram or share your photo of the recipe on Pinterest.
Print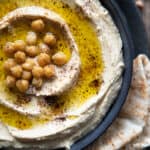
How to Make Hummus From Scratch Using Dried Chickpeas
- Prep Time: 10 minutes
- Soak Time: 12 hours
- Cook Time: 30 minutes
- Total Time: 12 hours 40 minutes
- Yield: 3 cups
Description
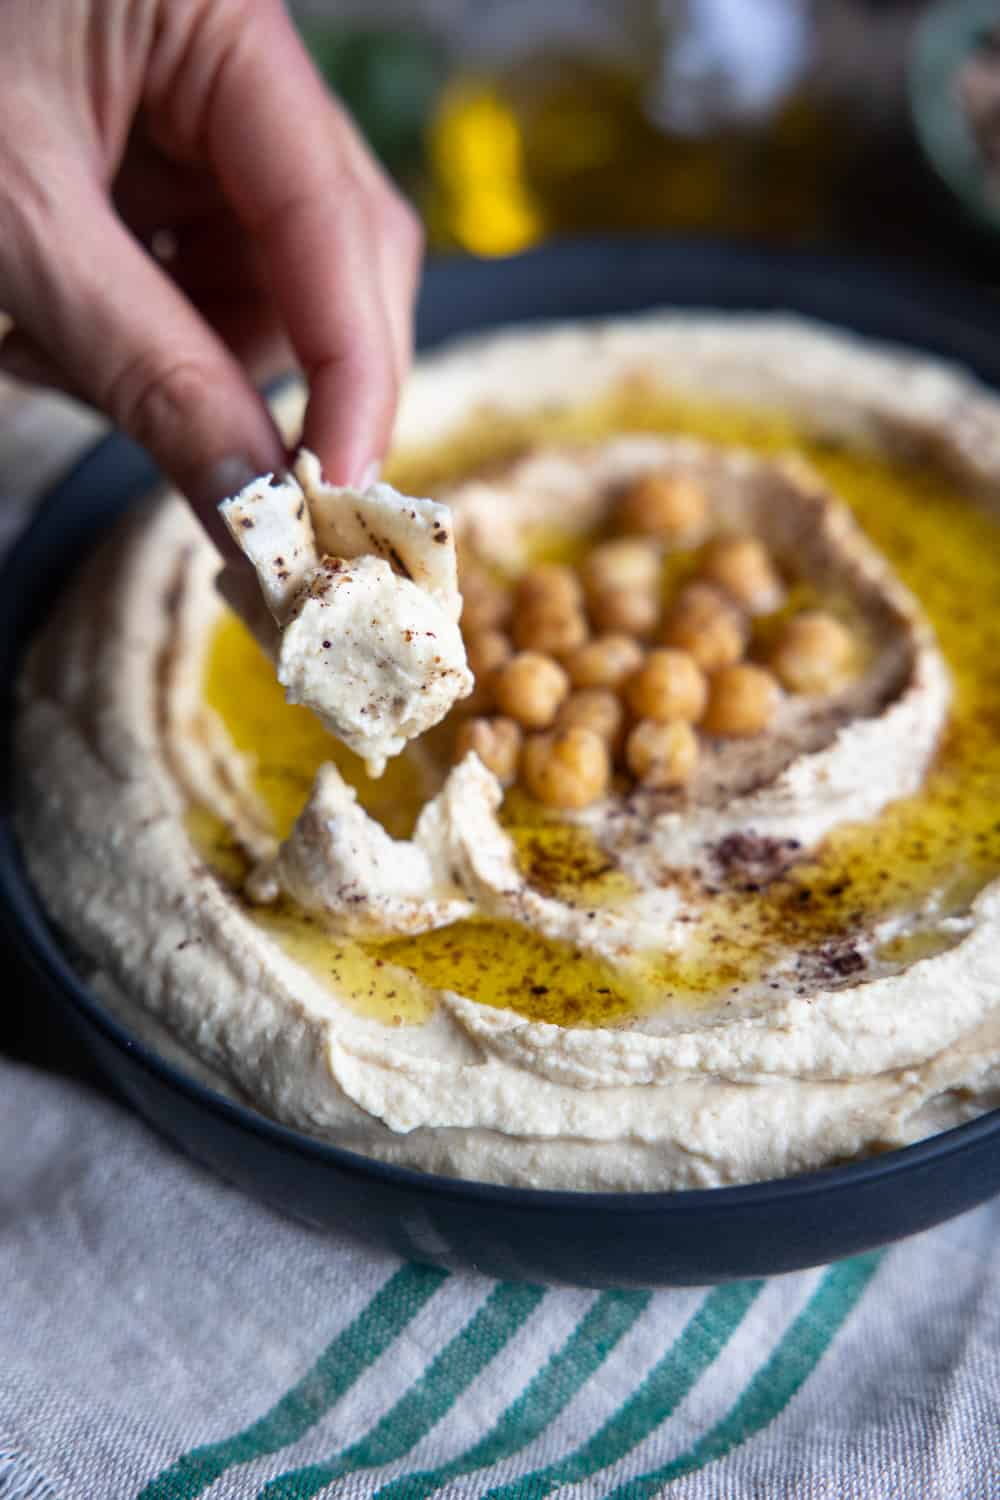
Silky smooth and creamy hummus that you’ll fall in love with. Great as a breakfast, a snack or accompaniment to your lunch or dinner. Perfect inside a wrap, as a dip, tossed through pasta or noodles, or in your favourite nourish bowl!
Ingredients
- 1 cup + 2 tablespoons / 210g dried chickpeas *
- ½ teaspoon bicarb soda
- 1½ teaspoon salt
- ⅓ cup / 85g hulled tahini
- 2 cloves garlic, chopped
- ⅓ cup / 80ml fresh lemon juice
- ¼ teaspoon cumin powder (optional)
Instructions
- In a bowl, add the dried chickpeas and 4 cups / 1 litre of water. Leave on your kitchen bench to soak overnight.
- Once the chickpeas have been rehydrated, drain the water they have been soaking in and add them to a medium saucepan with 5 cups / 1.25 litres of fresh water, with the bicarb soda and ½ teaspoon of the salt.
- Bring the chickpeas to a boil, then reduce to a simmer on medium heat and cook for 30-35 minutes until they’re super soft. To check, take one out, and if you can easily squeeze it between your fingers, they’re ready. (Please run the chickpea under cold water before trying this; otherwise, you may burn yourself). Most of the skins from the chickpeas will float to the top, and you can typically just collect them by scooping them from the top of the water. Rinse and repeat until you get most of the skins. Please don’t skip this step if you want creamy hummus!
- Add the drained chickpeas to your food processor* (leaving a couple of tablespoons aside for the topping) and blend until you get a smooth paste. This should take about a minute.
- If you find that your hummus is a little too thick, pour in cold water (around ¼ cup / 60ml) in one steady stream while the food processor is on. Add in the tahini, garlic, lemon juice, salt and cumin powder (if using). Blend on high for a few minutes, occasionally pausing to scrape down the sides.
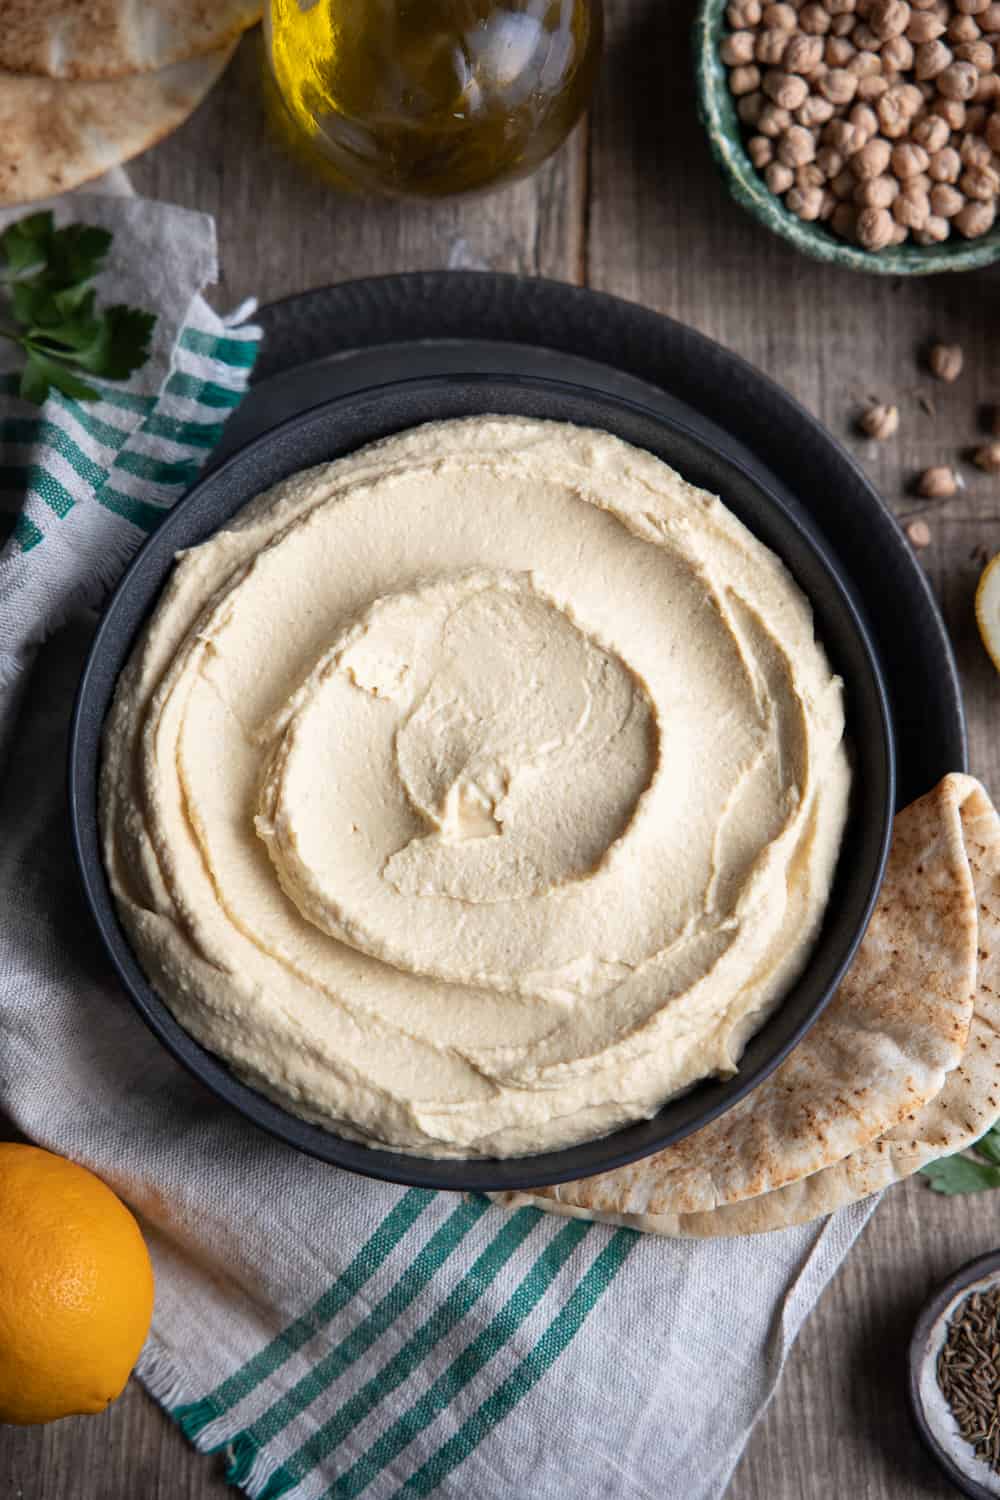
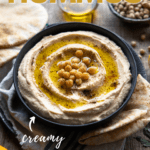
- Transfer to a bowl and spread out with the back of a spoon creating small waves or a spiral. Top with the chickpeas you saved earlier, drizzle a generous amount of olive oil, sprinkle with some cumin powder and sumac.
Notes
Dried chickpeas: If you don’t have time or can’t find dried chickpeas, you can use canned chickpeas instead. (Just note that you won’t get the same results.) Add the drained chickpeas to a pot with 5 cups / 1.25 litres of water and ½ a teaspoon of bicarb soda. Bring to a boil and then reduce to a gentle simmer and cook for around 15-20 minutes until the chickpeas are super soft. From there, follow the rest of the instructions as per the recipe.
Food processor: If you don’t have a food processor, you can use a blender or a pestle. See the tips and tricks section above for more information.
Hummus is freezer friendly. Simply add it to an airtight container – leaving about an inch of space at the top as the hummus will expand as it freezes. It will be fine for around 2-3 months in your freezer. To defrost, pop it in your fridge overnight. You may get a thicker consistency and can fix that with stirring in a bit of cold water. You can also store it in the fridge for up to 5 days.
- Diet: Vegan
Came out fantastic
I made made in quantity, and as having no bicarb and removed all the skins by hand. Result, a very smooth creamy humus 😁
My mom recently encouraged me to buy the bag of dried chickpeas and they are soooooo much better than the tinned ones! I cook them in my pressure cooker and they come out so buttery and creamy. I will make your hummus recipe for dinner and top it with some spiced ground beef and freshly made pita bread. Thank you!
Kick ass hummus! I added a dash of smoked paprika and cayenne pepper, and it was the best hummus I’ve ever had. Using dry beans is very worth it. I will not be buying hummus again.
The recipe is good, but I found the process of skin removal quite tedious. I’ll still use the recipe, but canned chickpeas, rinsed, with a dash of baking soda. Thanks for the recipe
I love this recipe! I make it at least 2 or 3 times a week. Cooking the beans are time consuming but it is so worth it. Sometimes I make it with curry powder. Yummy!
Thank you for the review! I think it’s worth it too 🙂 Great addition to so many things and a wonderful snack. I made a big batch this week as well. Might have to try it with curry powder next time.
This was great! Definitely making again. Wondering if there is a specific thawing method for the portion that I’m freezing.
Sorry for the late reply, Jenny. I would leave it in the fridge overnight. Happy cooking!
This hummus thaws perfectly! I will never stop making it this way! I rave about constantly! I’m may try to roast a red pepper and blend in as well. 😁
This was delicious! Better than any store bought hummus. Made it with the dried chickpeas and will definitely always make it this way. Made it again for a party I’m going to tonight. Can’t wait to hear the comments. Do Not leave out the Sumac. I feel that is the highlight on the hummus. SUMAC❤️
So happy you loved it, Patty! I agree, this is far better than any store bought hummus 😉 Would love to hear what people at the party thought of it x
The Hummas was a big hit at the party. They said it was better than what you buy at the store. 😍
Yay! So glad it was a hit 🙂 Thanks for sharing x
Just a tip… save the water from cooking the chickpeas (called aquafaba) and add that instead of plain water. This will make the hummus much lighter and smoother. You can also use it as a vegan egg substitute.
The only issue is once you add the bicarb soda to cook the chickpeas the aquafaba won’t be any good to use. It’s also not ideal for those that suffer from bloating or gas, but I like where your thinking is going 🙂
Great recipe. Pulling out the skins makes a huge difference, as does dried chickpeas. I made it as written but, in anticipation of greatness, doubled the recipe. Greed is bad. It worked but would have been easier to process if I hadn’t.
Very tasty, smooth, fresh and inexpensive. A winner.
So happy you enjoyed it, Patrick! I’ve done that before too 😂 takes a while to do it in batches. Thanks for the review!
This is so delicious! Only my second time, making hummus, and first time with this recipe. It’s a keeper!
Great to hear! Thank you for the lovely review x
Delicious! Made it as described with using raw chickpeas. Yes, the process of soaking, boiling, and simmering takes time. I gave it an hour and 30 minutes. Removing the skins is a meditative process but woth it. I did add the 1/4 c water as described; helpful. I’d make it again.
I really enjoyed this hummus, it has a great creamy texture and good flavor. I made it according to the recipe but left out the garlic as my partner is very sensitive to it. I’ll definitely make this again.
That’s great Jennifer! I’m glad you loved it and thank you for the review 🙂 Since creating this recipe my hummus expectations have gone through the roof haha. So now I only eat homemade.
Thanks for the great recipe. I never use canned beans because I don’t like the high sodium, lugging home all the water that comes with canned products, paying the extra cost, or recycling the cans. But I wasn’t sure I could achieve creamy hummus with dry beans. Your recipe worked. I did skip the dehulling step, but it was still creamy enough for me.
This is by far the BEST from scratch hummus recipe I have tried and LOVED! Quick question…the aquafab..because it has baking soda in it from cooking the chickpeas..can it still be used for baking and other uses? Thanks!
Yay! This is music to my ears (well, eyes), thank you for your lovely review, Christina 🙂 That’s a great question. I haven’t personally tried it, but I worry that it may not work for whipping as you do need to start with pure aquafaba to ensure it whips well. If you want to just use it for baking (without whipping), it should be fine to use with baking soda. It can also depend on the recipe you want to use it in. Hope that helps!
10/10. Wonderfully creamy. I enjoy the nuttiness, so I added 1/2 cup of tahini instead if 1/3 cup. Will make again for sure. Restaurant quality recipe!
Thank you for the wonderful review, and I’m so happy to hear you liked it! Next time, would you mind leaving a rating alongside your review? Thanks again! 🙂
Delicious recipe! I’ve never used canned chick peas myself, because there’s no way of getting rid of the (to me) unpleasant taste of the brine.
So I’ve made humus from dried chick peas before, but your recipe has some great tips that indeed gives it an amazing creamy texture. I love it!
My son and I like a little less tangy flavor, so I added some raw honey to make it just perfect for our taste buds. Thank you!
I’m glad the tips took your hummus to the next level! Thank you for the review x
It takes a while to prepare but this was my first time. I’m assuming it gets easier the more batches you make. It’s a good recipe and I will keep it as my regular. But I think I might reduce the salt just a smidge.
I began soaking of garbanzo’s yesterday, an made today.granted it’s takes longer, but well worth it, an love hummus. An wow what a difference, between canned, an dried garbanzo beans! It’s almost gone already! Definitely, will do this from now on. I made, I thought enough to freeze, but guess not, I did triple the amount of beans an other ingredients, because, had 24 oz. bag of main ingredient..
Thank you for a wonderful recipe made from scratch!
So glad you loved it, Yvette! Making hummus from dried beans does make it super luxurious and extra delicious! 🙂
I searched for a recipe I thought sounded good and found this one.
I am very happy with the taste of this but I can’t show a picture because we ate all of it.
I still need to work on removing the shell from the chickpea in some easier way.
Thank you for the recipe.
Great recipe. Made this using dried chick peas tastes simply amazing.
So glad you enjoyed it, Steve! Thank you for the review 🙂
How much is a ‘cup’ in grams please? As cups come in all different sizes I find these measurements don’t work for me. Thanks
1 cup is dried chickpeas is 195 grams. Hope that helps! I’ve updated the recipe with the measurements for 1 cup + 2 tbsp.
Wonderful, oil-free recipe! We have followed a version of this recipe for years now. We keep hummus around 24/7 and have several varieties including Jalapeño, Lemon and Cilantro, Sun-Dried Tomato, Chipotle, Kalamata Olive, Roasted Garlic, Artichoke, Eggplant (that one’s a little tricky), and Crushed Red Pepper. Great way to get your legumes in.
Sounds like you’re all over it with some great flavour combinations! Thanks for sharing 🙂